Removing the remove drivers side wheel hub 2004 mini cooper is an essential repair or maintenance task that may need to be performed due to issues with the wheel bearing, damaged hub, or suspension problems. While it can seem daunting, the process is relatively straightforward for those with basic automotive repair knowledge and the right tools. This guide will take you through the steps to remove the wheel hub, offering a clear, step-by-step approach for this task.
What You’ll Need remove drivers side wheel hub 2004 mini cooper
Before you begin, ensure you have all the necessary tools and equipment on hand. The most common tools required for removing a wheel hub from a 2004 Mini Cooper include:
- Car jack and jack stands: To safely lift and support the car.
- Lug wrench: For removing the wheel.
- Socket set: To remove various bolts and nuts.
- Breaker bar: For loosening tight bolts or the axle nut.
- Torque wrench: To ensure bolts are re-tightened to factory specifications.
- Hammer or mallet: To tap parts loose (like the hub).
- Brake fluid (if required): For brake components maintenance.
- Bungee cord or rope: To hang the brake caliper.
- Wheel hub puller tool (optional): For stubborn hubs that don’t come off easily.
It’s also advisable to wear safety gloves and goggles to protect yourself during the job.
1. Preparation Before Starting the Job
The first step in removing the driver’s side wheel hub is ensuring you’re working in a safe and suitable environment. A flat surface is necessary for lifting the car and working underneath it. Additionally, you’ll need to gather all your tools, and have plenty of space to work around the car.
Step 1: Park the Vehicle Safely
Before lifting the remove drivers side wheel hub 2004 mini cooper, make sure the car is parked on a flat, level surface. Engage the parking brake to prevent any movement while the car is jacked up. If you have wheel chocks available, place them behind the opposite tires to ensure added stability.
Step 2: Loosen the Lug Nuts
Before lifting the car, you should loosen the lug nuts on the driver’s side front wheel. This step is easier when the car is still on the ground because the wheel won’t rotate. Use a lug wrench to break the torque on the lug nuts, but do not fully remove them at this stage.
2. Lifting the Vehicle
Once the car is safely parked and the lug nuts are loosened, the next step is lifting the vehicle.
Step 1: Position the Jack
Place the car jack underneath the designated jacking point on the car. For most vehicles, this is near the front axle or the frame of the car. On a 2004 Mini Cooper, you can usually find the jacking point near the lower part of the car’s body.
Step 2: Lift the Car
Lift the vehicle until the driver’s side front wheel is a few inches off the ground. Once you’ve raised it enough, position the jack stands underneath the car. Never rely solely on the jack to support the vehicle, as this can be dangerous. Always use jack stands for additional safety.
Step 3: Remove the Wheel
Now that the car is safely supported, remove the loosened lug nuts entirely and set the wheel aside. Make sure to store the lug nuts in a safe place for reinstallation later.
3. Removing the Brake Components remove drivers side wheel hub 2004 mini cooper
Before accessing the wheel hub, you’ll need to remove the brake components from the wheel assembly. This ensures you won’t damage the brake caliper or rotor during the hub removal process.
Step 1: Remove the Brake Caliper
The brake caliper is secured by two bolts, which you’ll need to remove using a socket wrench or an impact gun. Once the bolts are removed, carefully slide the brake caliper off the rotor. Be sure not to strain the brake line by letting the caliper dangle. Instead, secure it with a rope or bungee cord to hang it from the suspension components.
Previous article; How to jump dstart bmw 325 2011 A Complete Guide
Step 2: Remove the Brake Rotor
With the caliper out of the way, you can remove the brake rotor. In some cases, the rotor may be stuck due to rust or debris. If it’s difficult to remove, tap it gently with a hammer until it comes loose. Ensure the rotor is free from the hub and set it aside.
4. Removing the Axle Nut
The axle nut is typically located at the center of the wheel hub. This nut secures the axle to the wheel hub and must be removed to free the hub assembly.
Step 1: Loosen the Axle Nut
Using a large socket and a breaker bar, loosen the axle nut. The axle nut is often very tight, so you may need to apply significant force to break it loose. If the nut is extremely difficult to remove, you might consider using an impact wrench for additional torque.
Step 2: Remove the Axle Nut
Once the axle nut is sufficiently loosened, continue to remove it completely. Set the axle nut aside in a safe location.
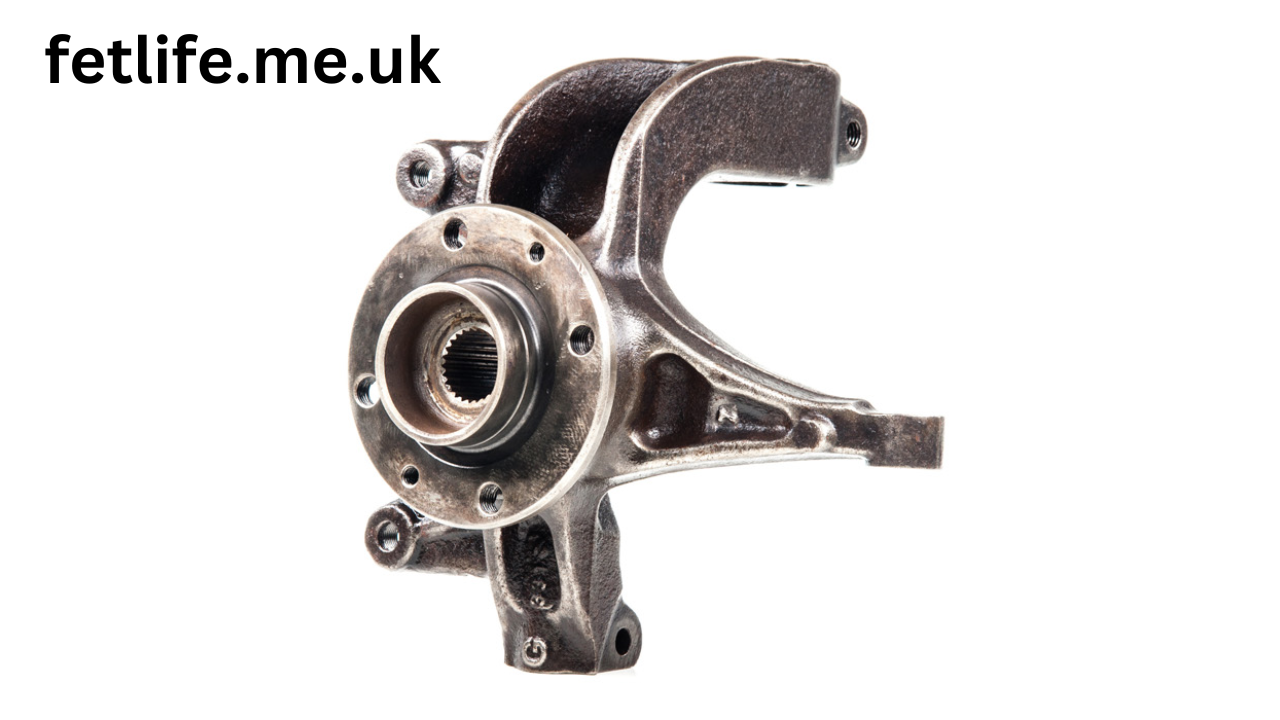
5. Disconnecting the Wheel Hub from the Steering Knuckle
Now that the axle nut has been removed, the next step is to disconnect the remove drivers side wheel hub 2004 mini cooper from the steering knuckle. This can be one of the more challenging steps, as the hub is often secured by multiple bolts.
Step 1: Identify the Securing Bolts
The wheel hub is typically secured to the steering knuckle with two or more bolts. These bolts are usually located at the back of the wheel hub assembly, so you’ll need to look for them carefully. Use a socket wrench to remove these bolts.
Step 2: Remove the Hub
Once the bolts are removed, the hub should be free to come off the steering knuckle. If the hub does not come off easily, tap it gently with a hammer or mallet to loosen it. Be cautious not to damage the surrounding suspension components or the steering knuckle.
In some cases, the wheel hub may be stuck due to rust or corrosion. A wheel hub puller tool can make this process easier if necessary.
6. Inspect the Hub and Bearings
With the wheel hub removed, take the time to inspect the hub and the surrounding components. Check the wheel bearings for any signs of wear or damage. If you’re replacing the wheel hub due to a worn bearing, it may be necessary to remove the old bearing from the hub before installing the new one. This can sometimes require a press or special bearing removal tools.
7. Installing the New remove drivers side wheel hub 2004 mini cooper
Once the old hub is removed, you can now install the new one. Be sure to clean the mounting area on the steering knuckle thoroughly before fitting the new hub.
Step 1: Position the New Hub
Position the new wheel hub in place on the steering knuckle. Align the hub with the bolt holes and the axle spline.
Step 2: Secure the Hub
Using the bolts that were removed earlier, secure the new hub to the steering knuckle. Tighten the bolts to the manufacturer’s recommended torque specifications. If you’re unsure of the correct torque, refer to the 2004 Mini Cooper’s service manual.
8. Reassembling the Brake Components
After the new hub is installed, you can begin reassembling the brake components.
Step 1: Reinstall the Brake Rotor
Place the brake rotor back onto the wheel hub. Ensure it sits flat and correctly on the hub.
Step 2: Reinstall the Brake Caliper
Reattach the brake caliper to the rotor, making sure it aligns properly with the rotor and securing bolts. Tighten the caliper bolts to the recommended torque specifications.
9. Reattaching the Axle Nut
The axle nut you removed earlier will need to be reinstalled. Slide the axle through the new hub, ensuring it fits correctly into place. Reinstall the axle nut and tighten it with a torque wrench to the manufacturer’s specified torque setting.
10. Reinstalling the Wheel and Lowering the Car
With the wheel hub and brake components reassembled, it’s time to reinstall the wheel.
Step 1: Reinstall the Wheel
Place the remove drivers side wheel hub 2004 mini cooper onto the hub, ensuring the lug holes align with the wheel bolts. Hand-tighten the lug nuts onto the wheel bolts.
Step 2: Lower the Vehicle
Carefully use the jack to lift the car just enough to remove the jack stands. Once the stands are removed, lower the vehicle to the ground. Once it’s fully lowered, use a torque wrench to tighten the lug nuts to the manufacturer’s specified torque setting in a star pattern.
11. Final Check and Test Drive
Once everything is reassembled, double-check your work to ensure all bolts are tightened properly, and that the brake components are secure. After verifying everything is in place, take the car for a short test drive to check for any unusual noises or issues with the wheel hub or brakes.
Conclusion
Removing and replacing the remove drivers side wheel hub 2004 mini cooper may seem like a complex task, but with the right tools and instructions, it can be completed safely and efficiently. This process requires patience and attention to detail, but by following the steps outlined above, you’ll ensure the job is done right and your vehicle is back in top shape.
Whether you’re replacing a damaged wheel hub, repairing worn bearings, or performing general maintenance, taking care of your Mini Cooper’s wheel hub can save you from bigger issues down the road. If you’re not comfortable performing the job yourself, it’s always a good idea to consult with a professional mechanic.